In this guide, I will teach you how to update the server. There are many reasons to ensure your server is up to date, including increased performance and efficiency, as well as enhanced security.
To begin, log into your CentOS server.
To update a single package, you can run the following command:
dnf update package_name
Type Y for yes when prompted, or add the -y flag to the command to assume yes.
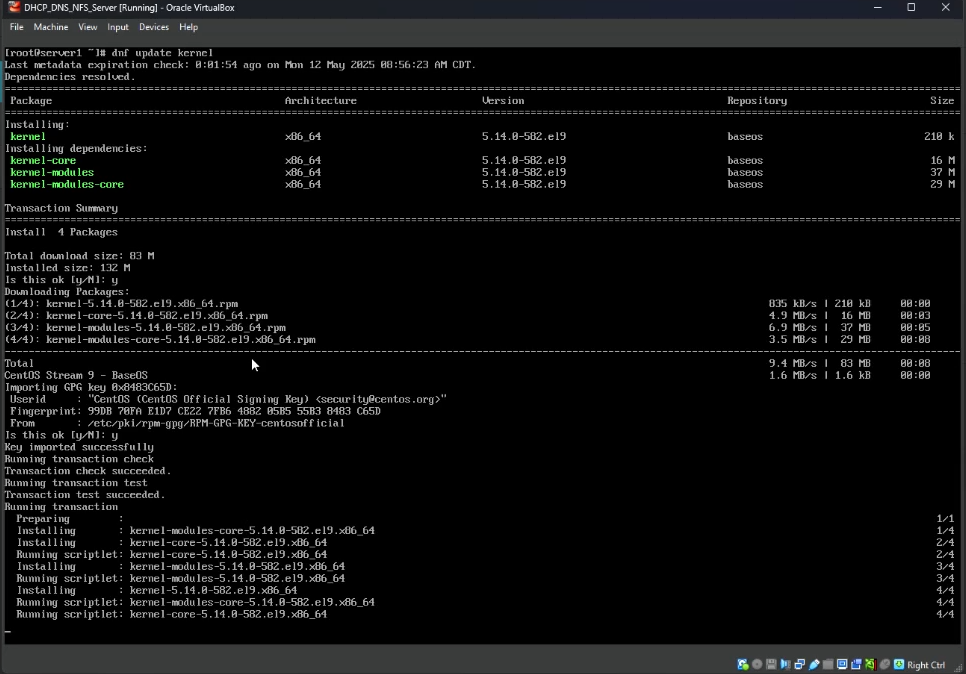
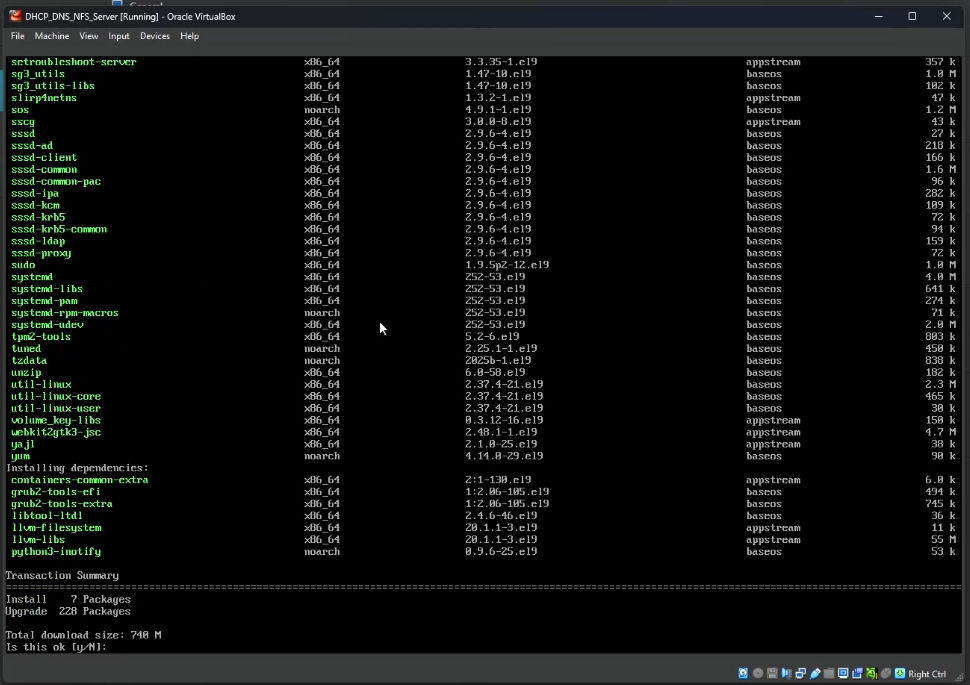
To update all packages and assume yes, run the following command:
dnf update -y
After this is completed, it is best to reboot the system. On your lab server, this can be done at any time. If this was a work production system, you will want to ensure that this is scheduled during a maintenance window, and all necessary applications that need to be shutdown will be shutdown gracefully. To reboot, just run any of the following commands:
reboot
shutdown -r now
systemctl reboot

Note: If you just do 'shutdown -r', this will show a message stating the reboot will occur 1 minute from now, and the reboot can be canceled with 'shutdown -c'.
All done! Your server should now be back online and fully updated. Please note that this only applies to packages that are available within the repositories listed in /etc/yum.repos.d/ repo files.
For this demonstration, I will be creating a new VM within Oracle Virtualbox. Feel free to use any virtualization software that you prefer, but the steps to setup the VM will differ.
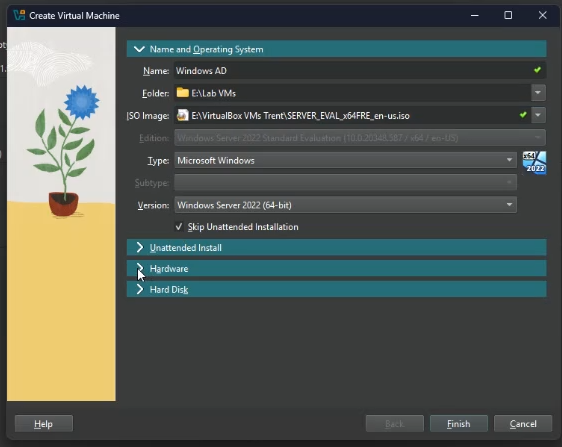
Step 1 – Create New VM
Once Virtualbox is open, click on the New button.
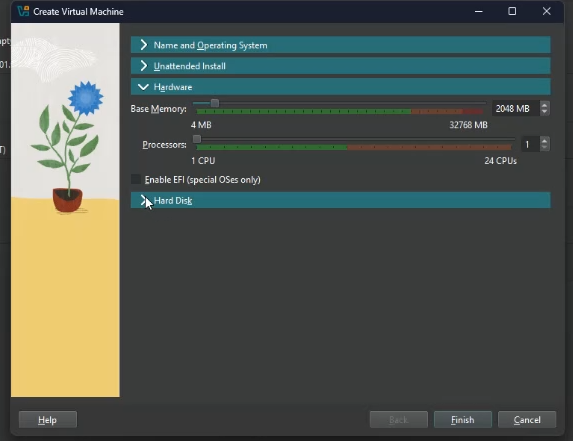
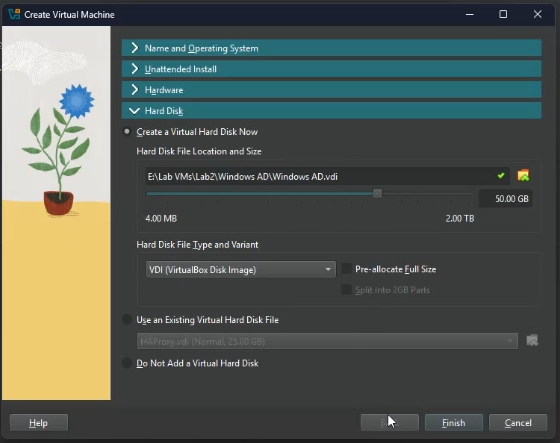
Create a Name for your VM, select the folder where you want the VM files to be stored, select the ISO image (I am using Windows Server 2022 ISO located here), and assign how much memory and CPU cores you’d like for your VM to have. Click Finish once done
Step 2 – Setup Operating System
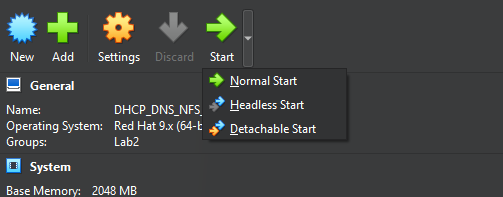
Once created, click on Start to boot the VM using the ISO. You can click the arrow next to Stat to either boot the VM using a Headless Start or Detachable Start.
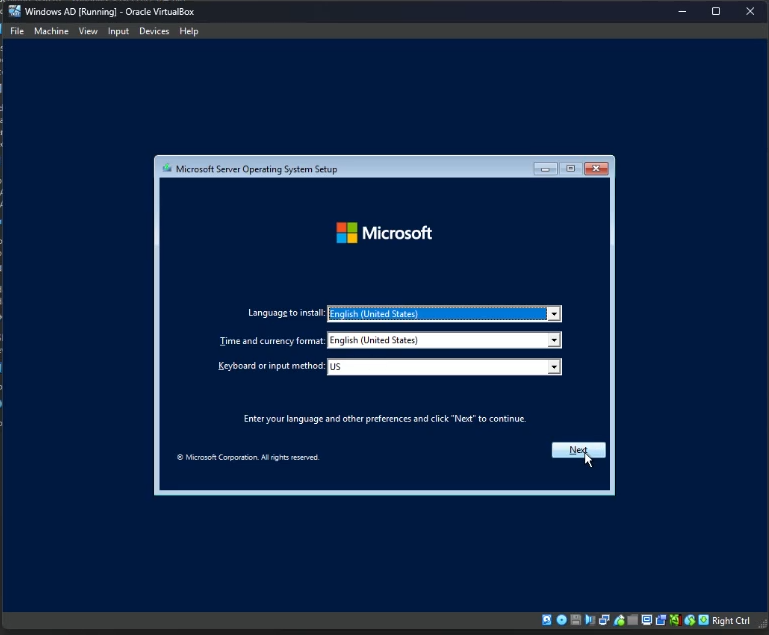
Once the system boots, you should be at a screen named “Microsoft Server Operating System Setup”. Edit the options to your needs and click Next.
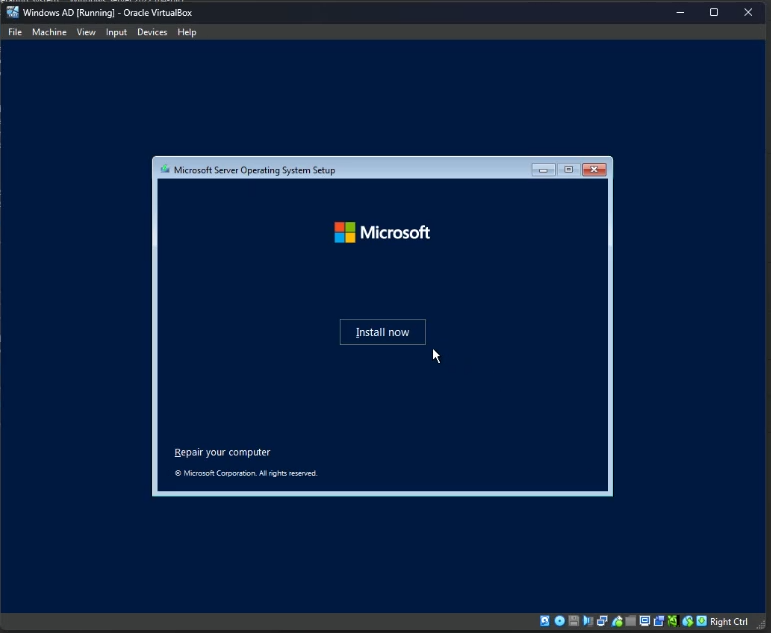
Click “Install now”.
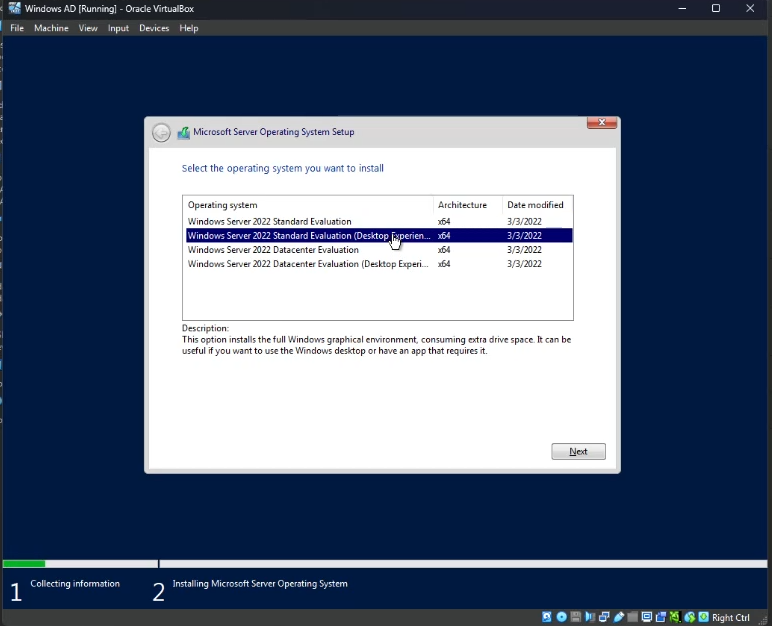
For installation with Desktop/GUI (Graphical User Interface), select “Windows Server 2022 Standard Evaluation (Desktop Experience). If you do not select Desktop Experience, you will not get the full graphical environment. Click Next.
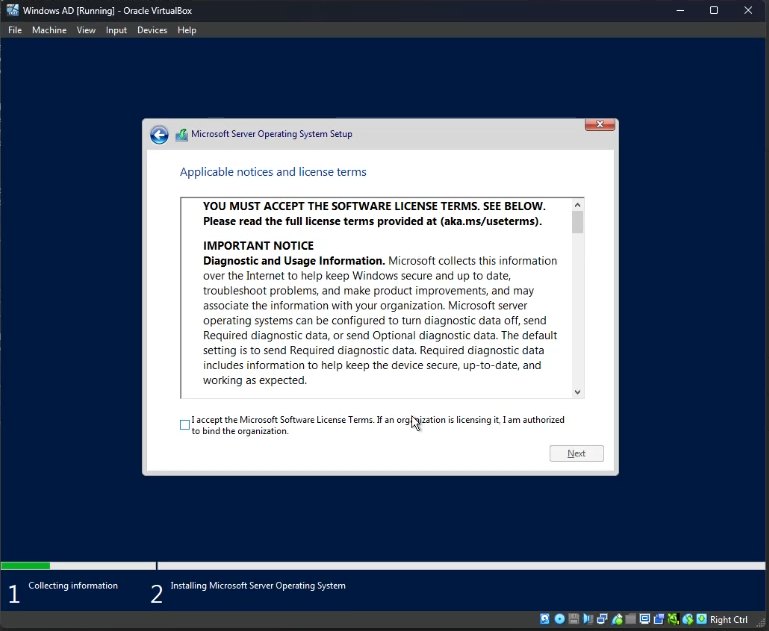
Click the check box to accept the license terms. Click Next.
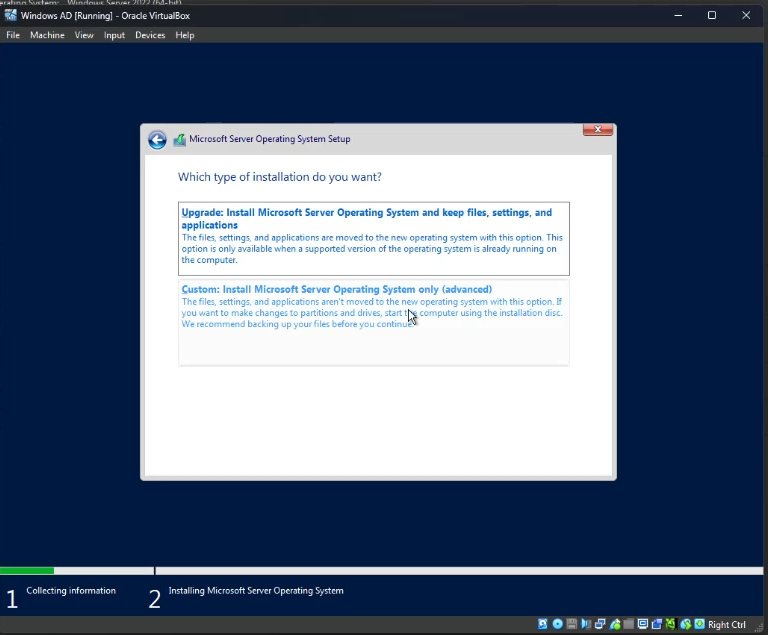
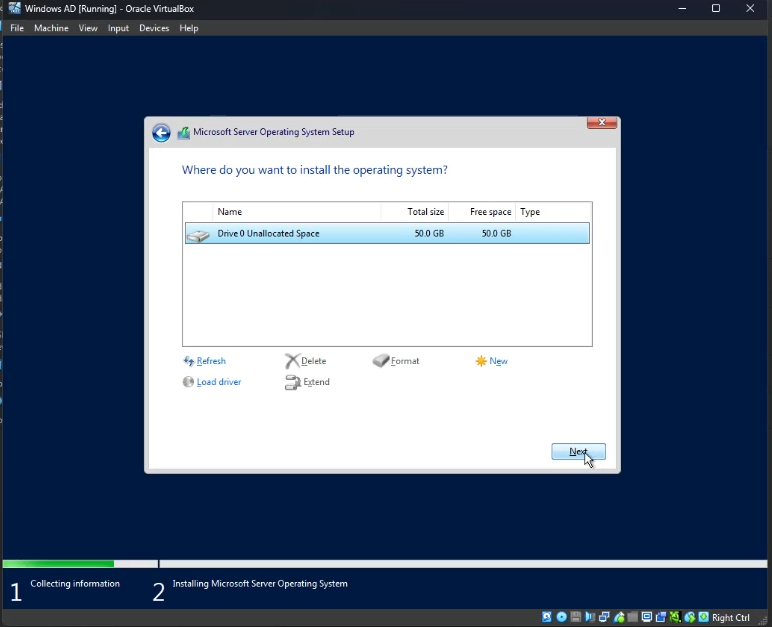
Under “Which type of installation do you want?”, select Custom.
Under “Where do you want to install the Operating system?”, ensure Drive 0 is selected (unless you want to install it on a different drive) and click Next.
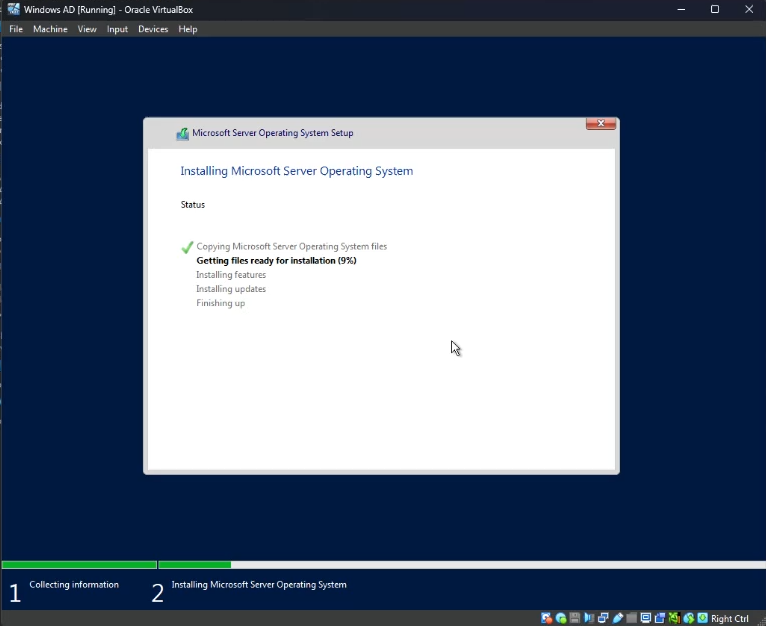
The OS should now begin installing. It should take roughly 4 minutes to complete this process.
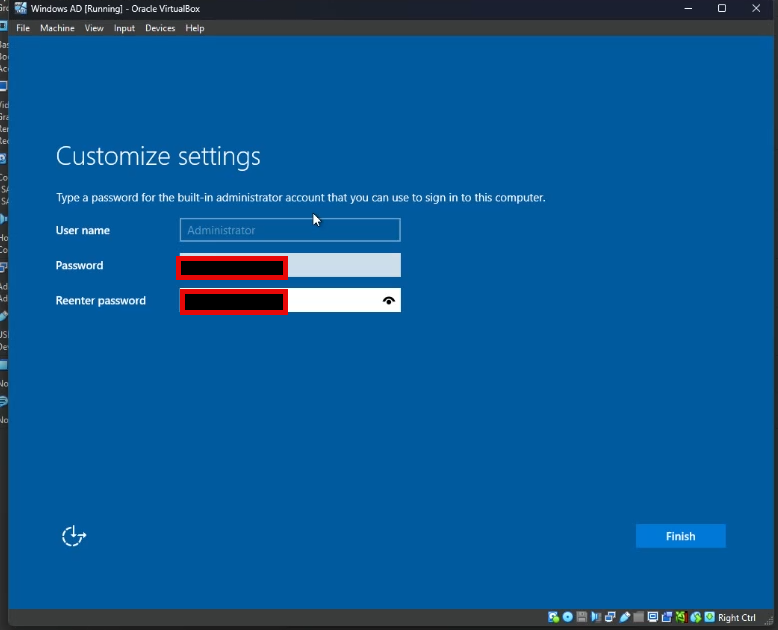
Once completed, you should be at a screen asking you to set the Administrator password. Enter a password that is somewhat complex. A short password that is easy to guess will not work.
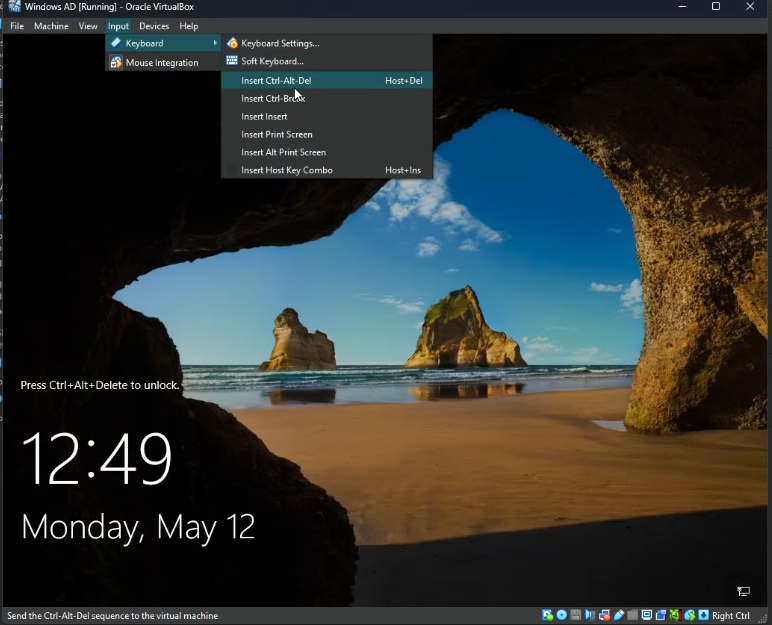
Once completed, you should be at a screen asking you to press Ctrl + Alt + Delete to unlock. As this is a VM, this button combo will bring up a menu for your local PC. Within the VirtualBox menu, select Input at the top, Keyboard > Insert Ctrl + Alt + Del. Then enter the Administrator password you just set.
You are good to go! Windows Server 2022 has been installed.
In this guide, I will teach you how to create a Gold Image within Virtualbox. The biggest reasons to have a Gold Image is that it saves you time and makes operations more efficient, as you do not have to go through the setup process for every VM that you create.
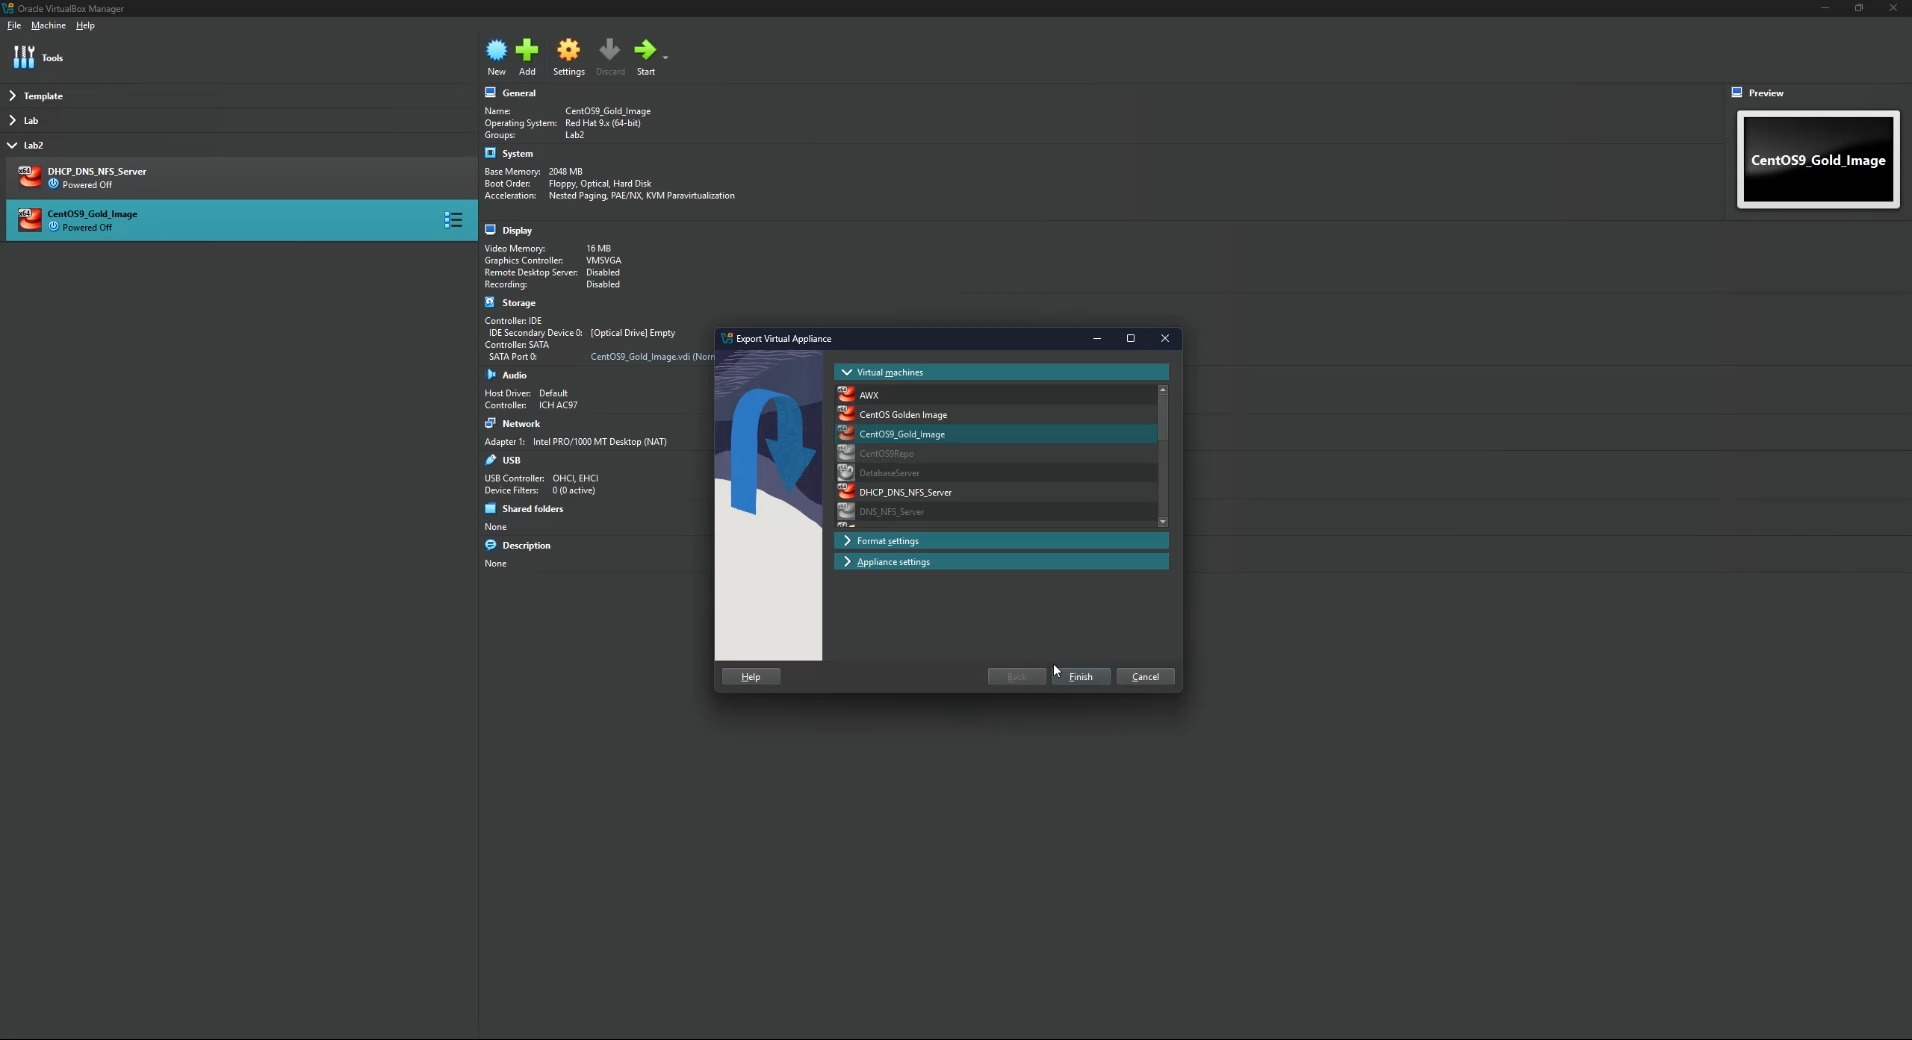
Step 2: With the VM Shutdown, Select File > Export Appliance.
Step 3: Under Virtual Machines, select the VM that you want to create a Gold Image from.
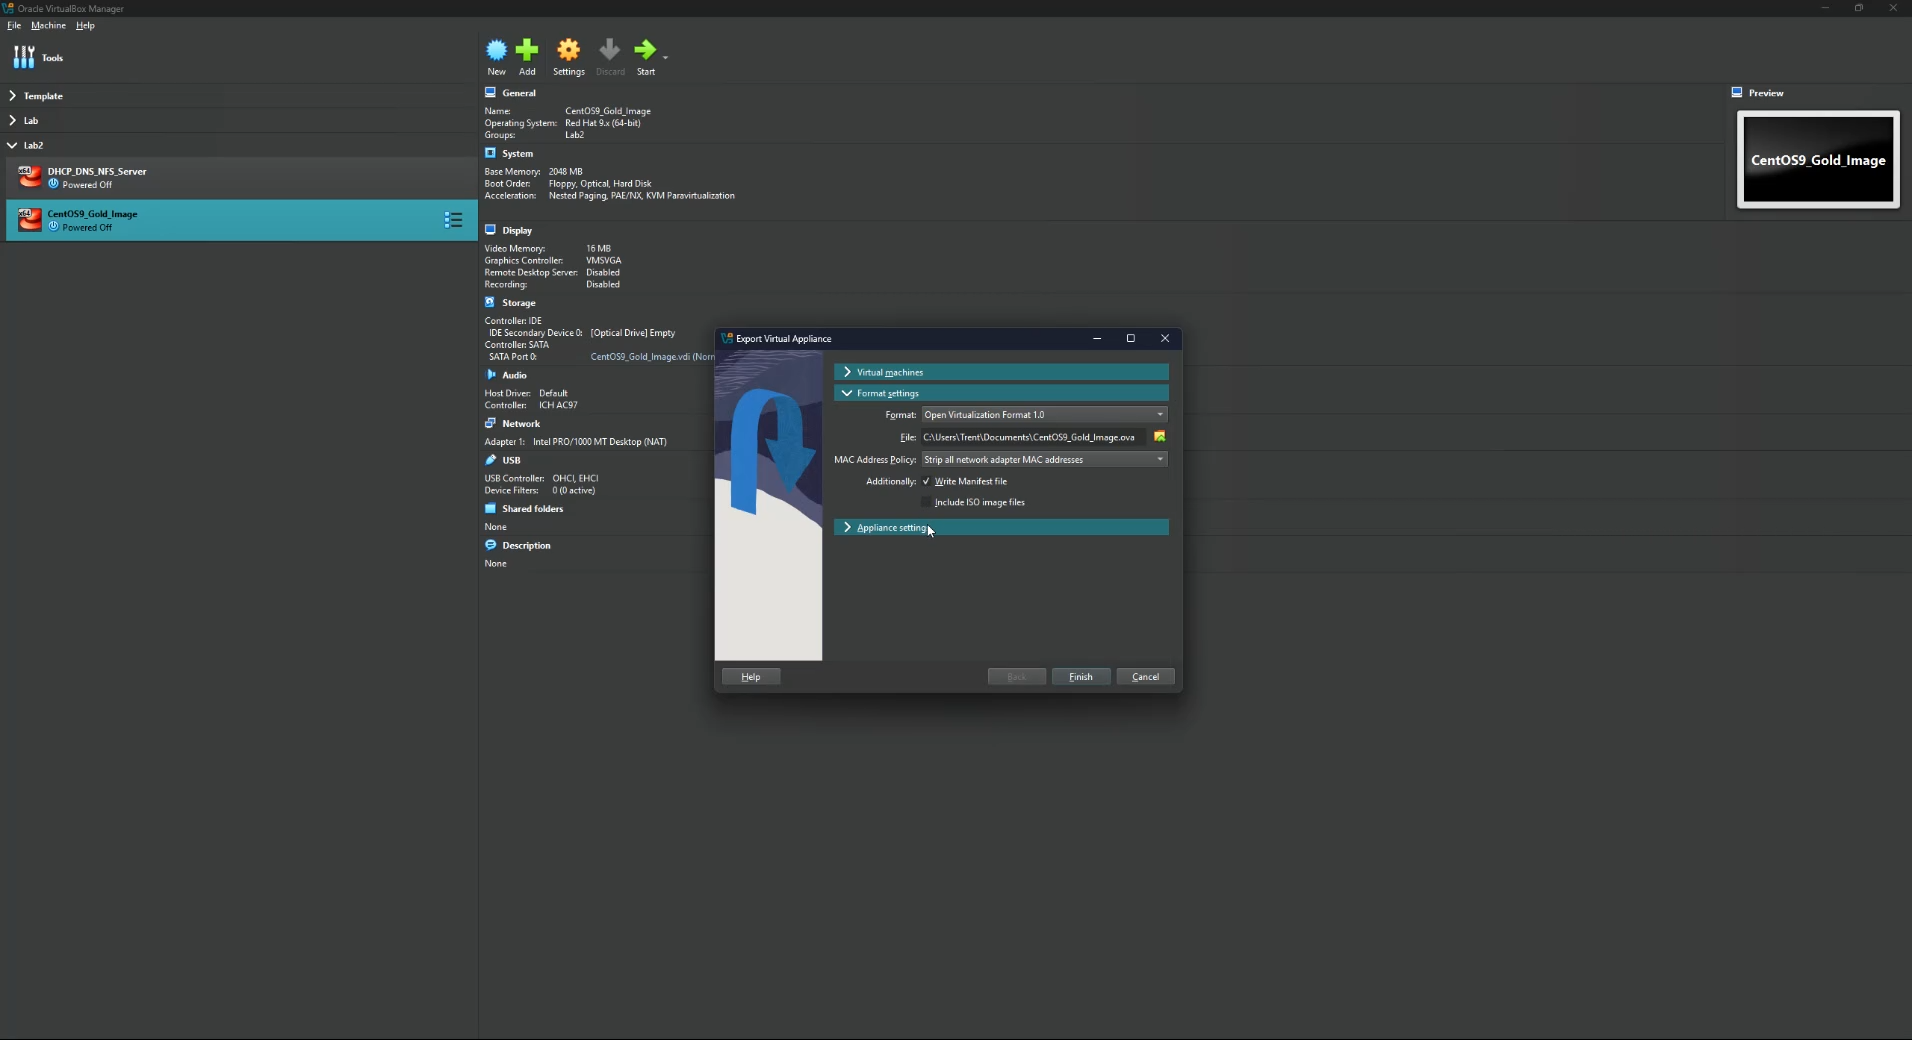
Under Format settings, select the format that you want to export it as. I have left this default.
Select the location where you want the .ova file to be placed.
For MAC Address Policy, I have selected Strip all network adapter MAC addresses, as we will be regenerating the MAC addresses when creating a new VM anyway.
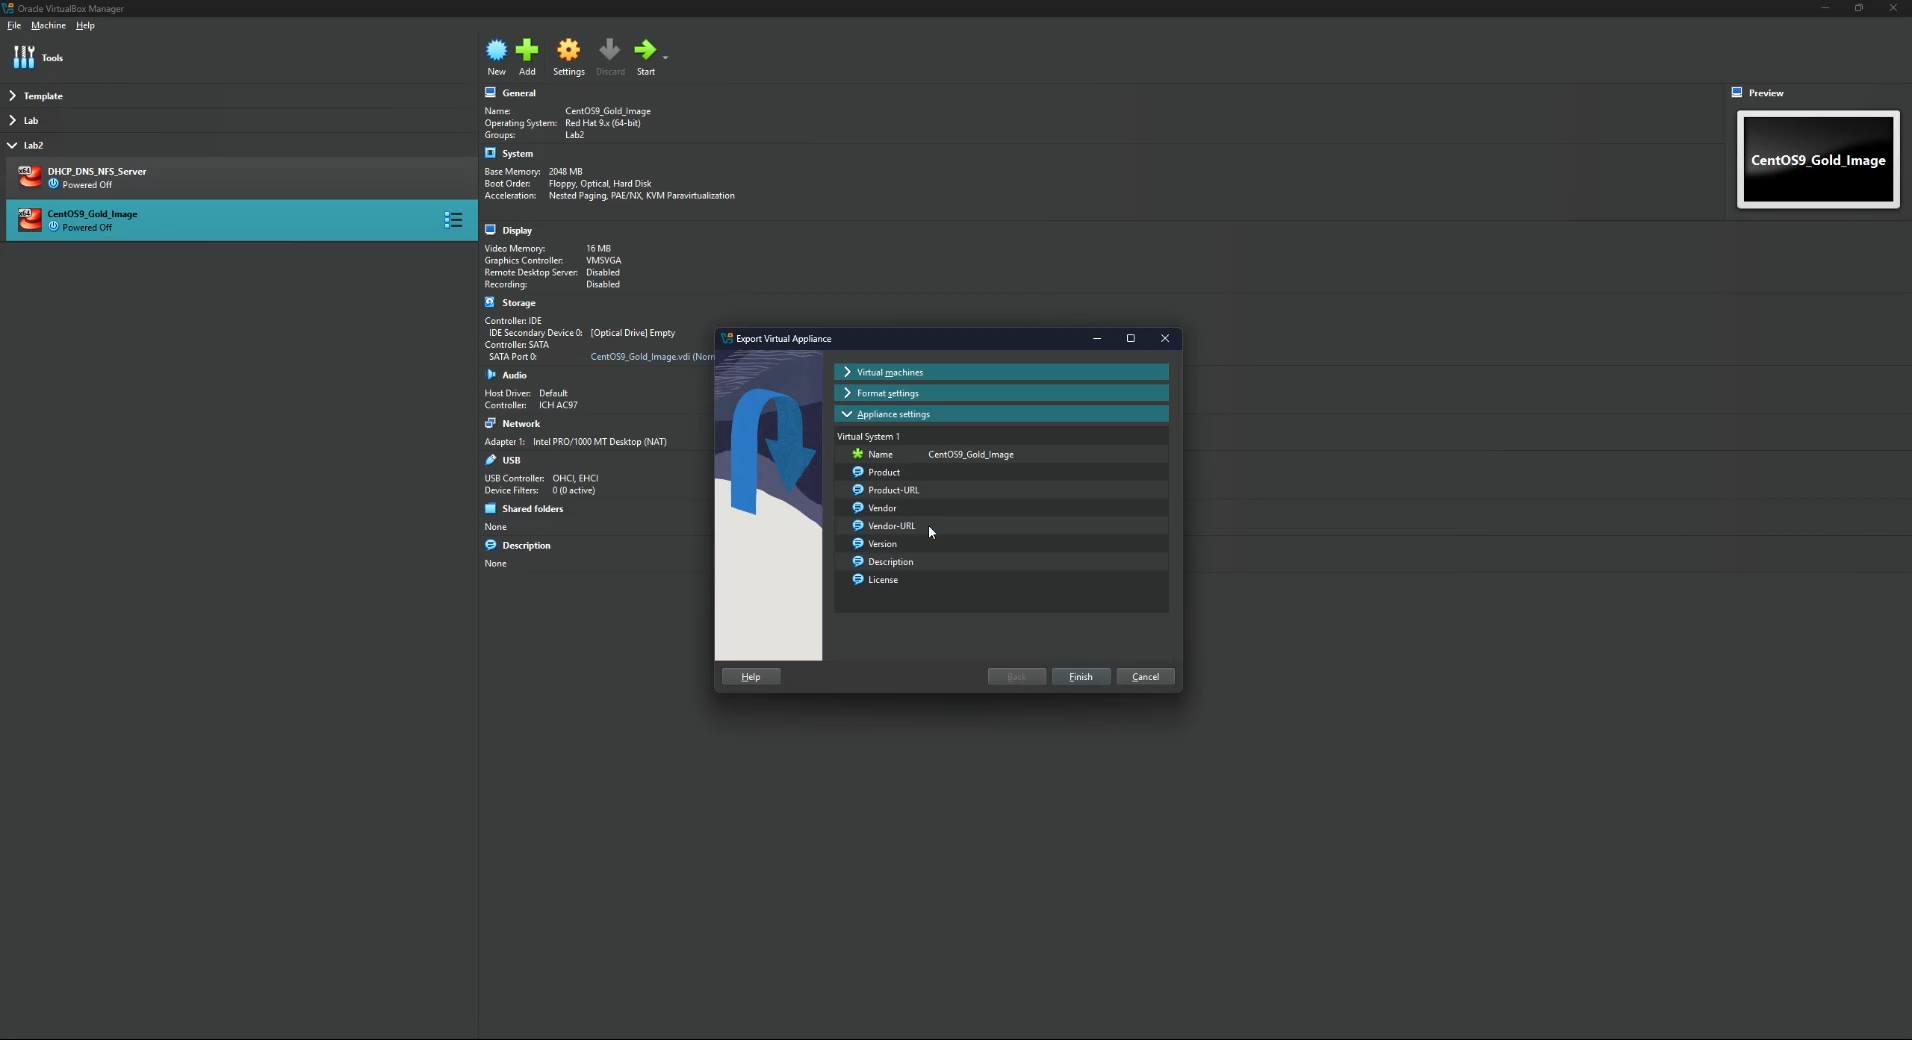
Under Appliance settings, change the Name of the Image to one that makes sense to you.
For this demonstration, I will be creating a new VM within Oracle Virtualbox. Feel free to use any virtualization software that you prefer, but the steps to setup the VM will differ.
Step 1 – Create New VM
Once Virtualbox is open, click on the New button.
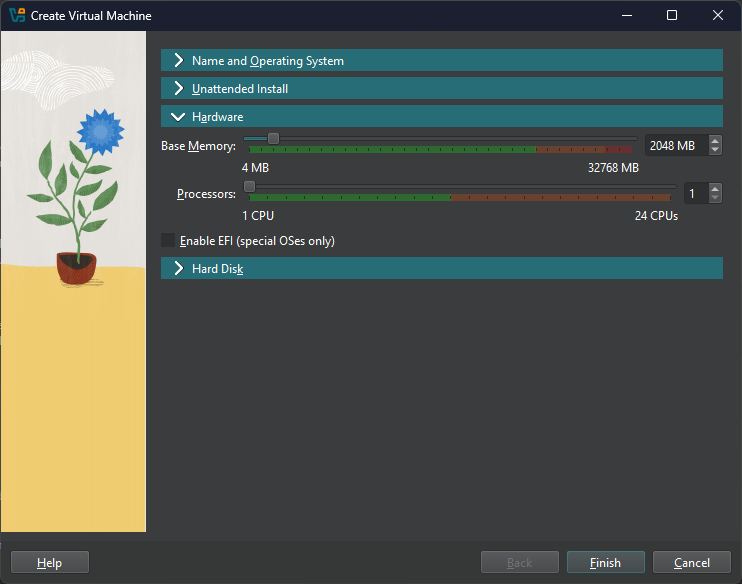
Create a Name for your VM, select the folder where you want the VM files to be stored, select the ISO image (CentOS Stream 9 Download), and assign how much memory and CPU cores you’d like for your VM to have. Click Finish once done
Step 2 – Setup Operating System
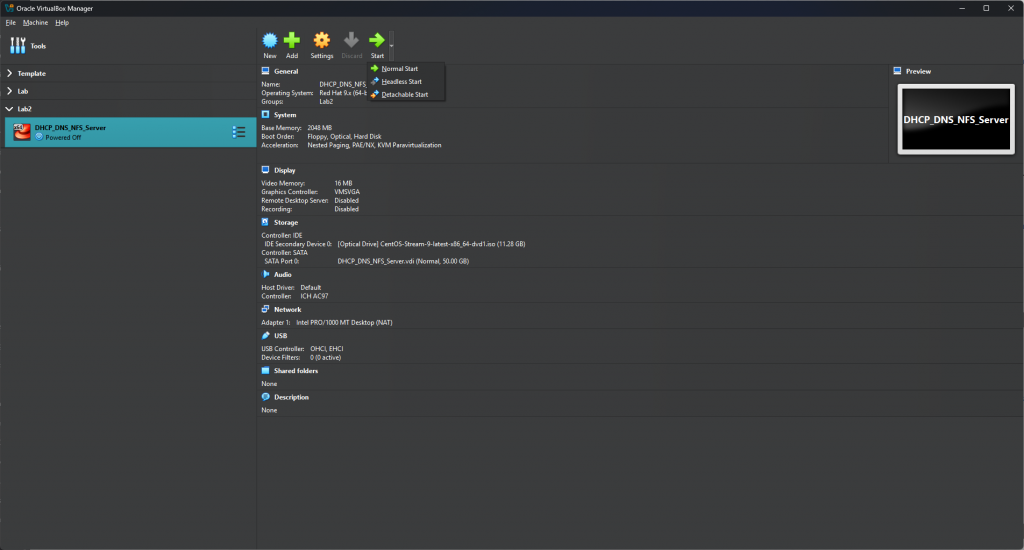
Once created, click on Start to boot the VM using the ISO. You can click the arrow next to Stat to either boot the VM using a Headless Start or Detachable Start.
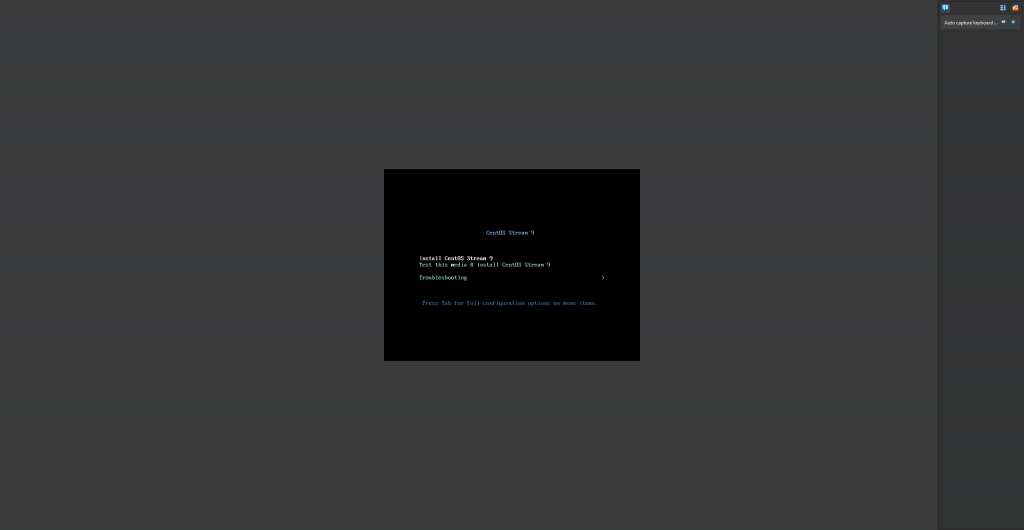
Once the system begins booting, select “Install CentOS Stream 9” in the console window.
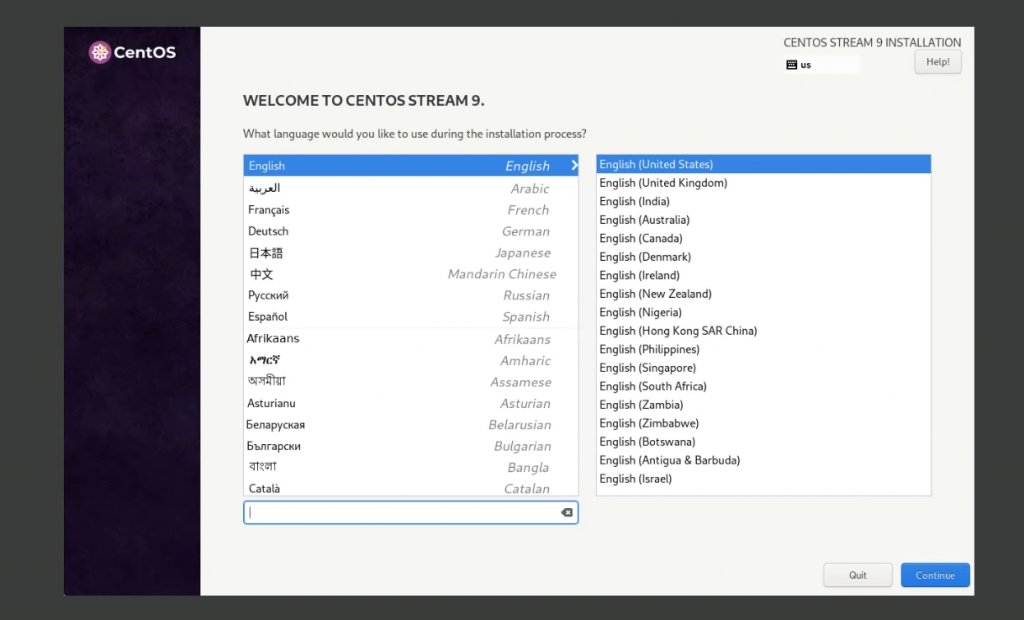
Select your Language, then click Continue.
On this next screen, there are a lot of options, but I will cover a few.
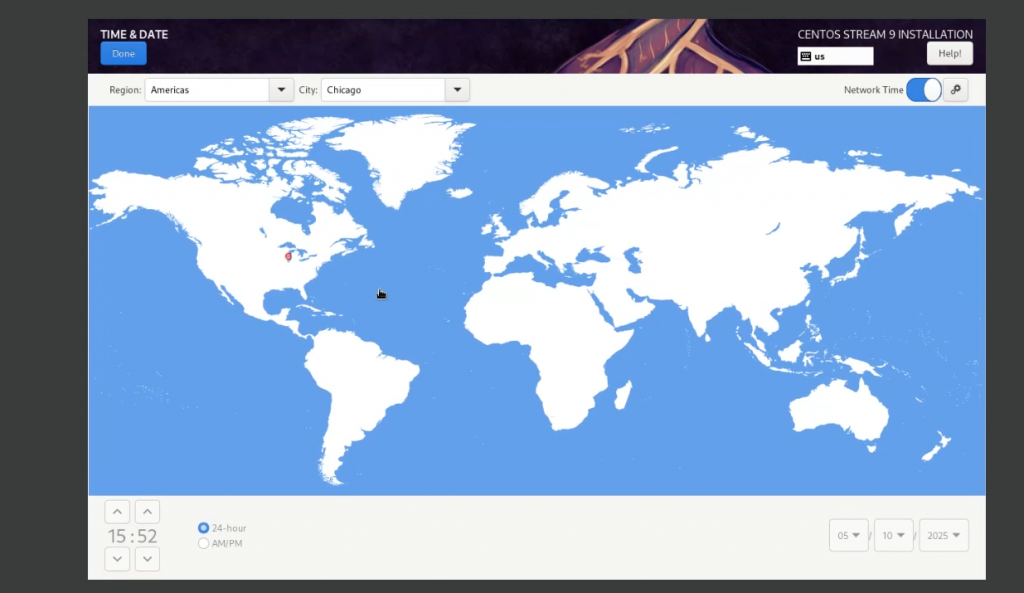
For Time & Date, select your correct Time Zone based on the Region and City that is within your time zone. If your network interface is working, you will see Network Time enabled in the top right, along with the correct time in the bottom left.
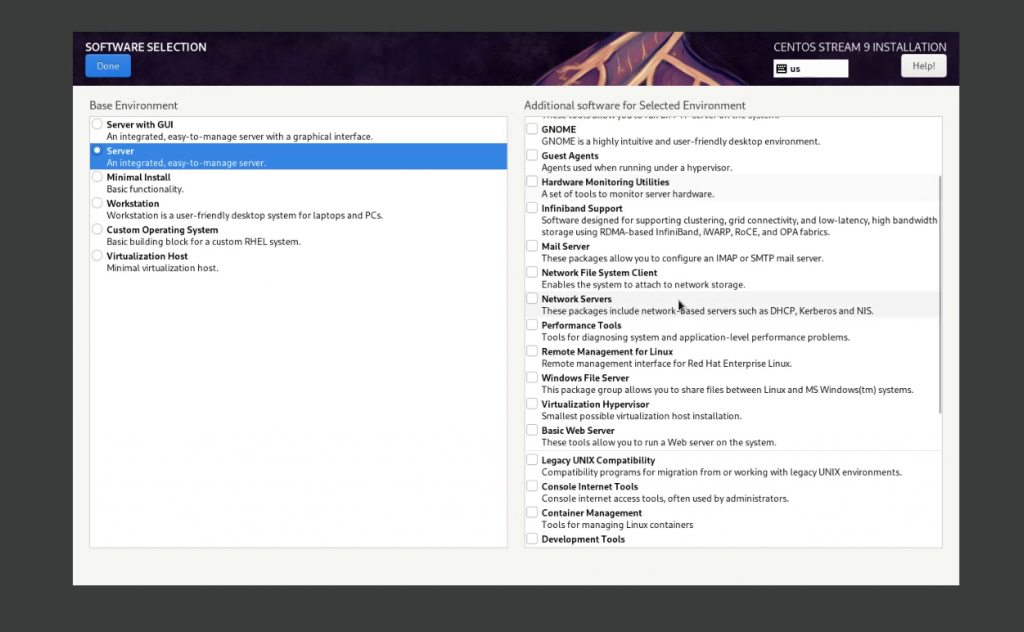
For Software Selection, this is where you will be able to choose between options like Server with GUI, Server only, Minimal Install, as well as additional software that will already be installed for you to use immediately. For this demonstration, I will select Server with no additional software.
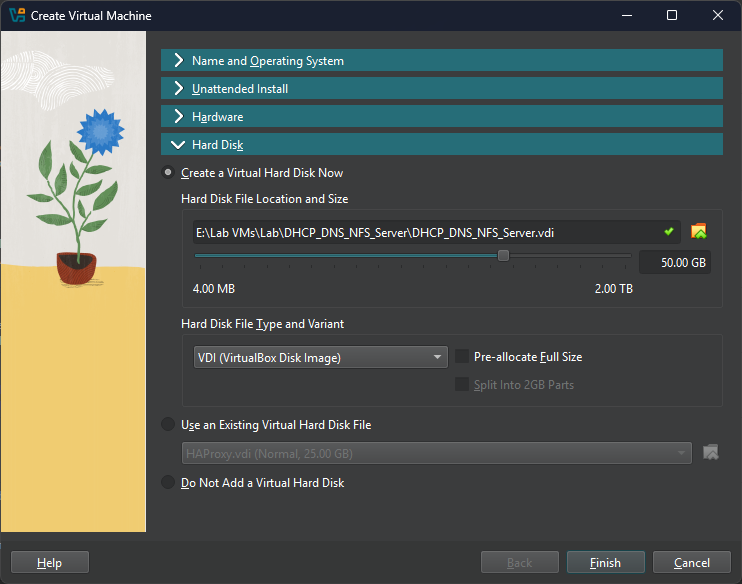
For Installation Destination, this is where you can select the Disk that the OS will be installed on, as well as assign specific filesystems to have specific sizes. For this demonstration, will leave everything default. (Note: If you use an existing disk, you will have to either assign a new disk or reclaim the space).
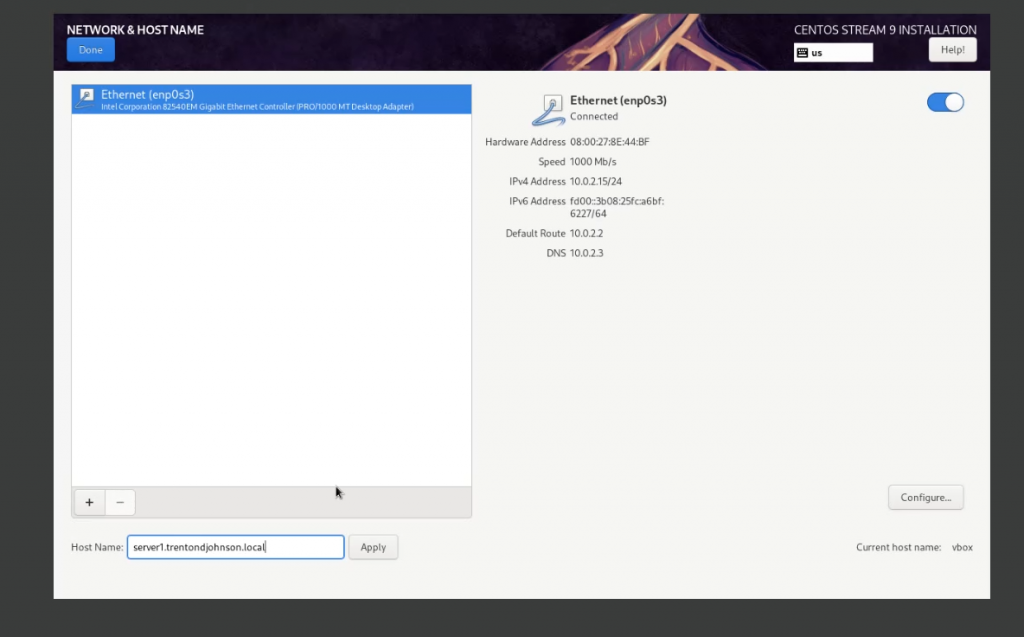
For Network & Host Name, the main thing I focus on is the Host Name in the bottom left. Type in a name that you will like to call this server and click Apply. In this demonstration, I have chosen server1.trentondjohnson.local
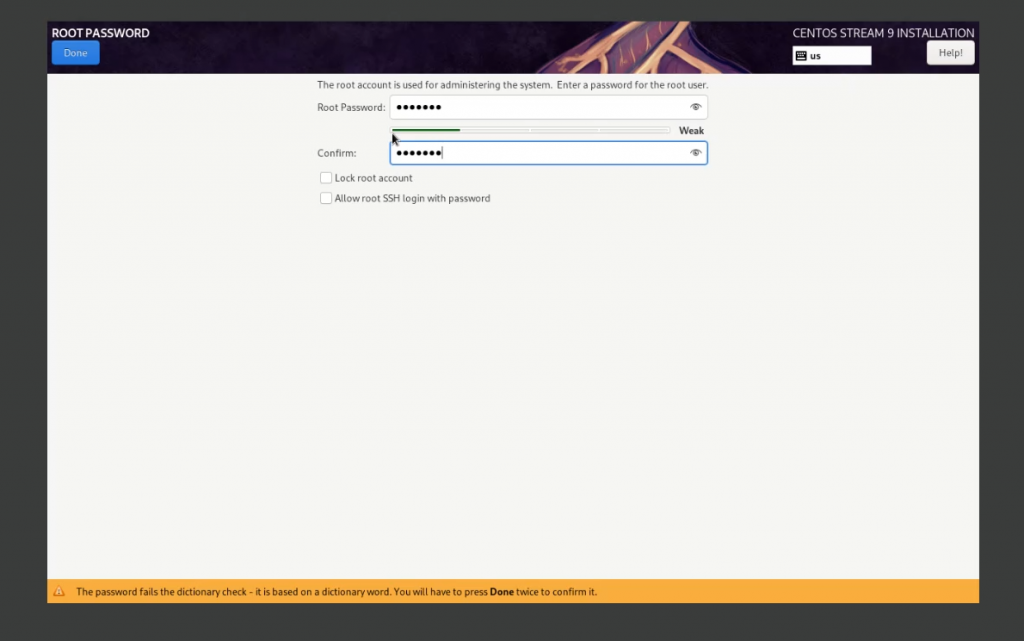
Next is Root Password. Enter a password for the root user, then click Done. You can also lock the account or allow root to login via SSH, which is not advised.
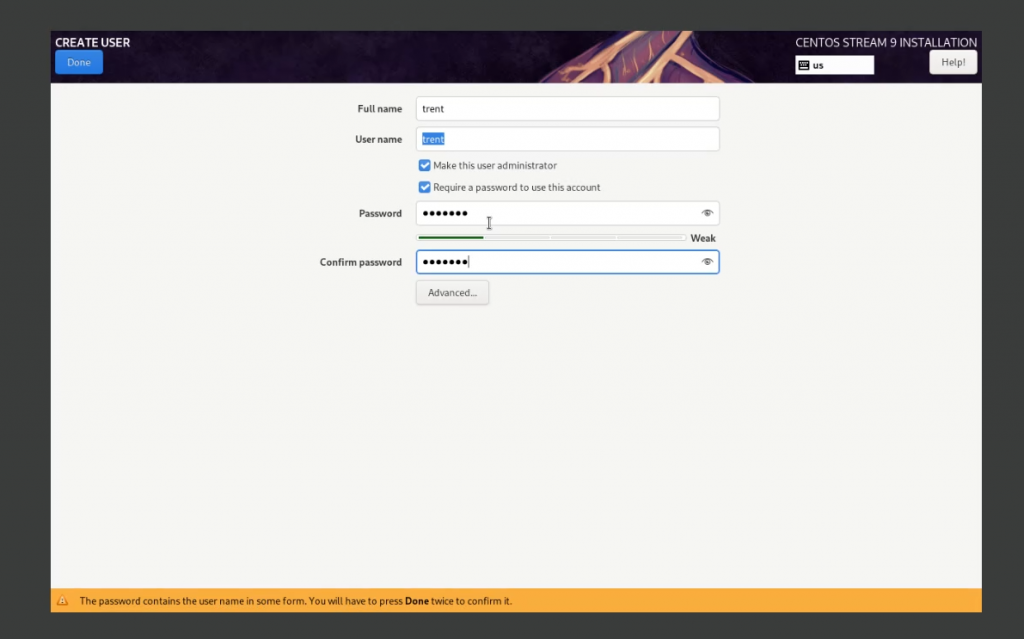
For User Creation, this is where you would create your non-root user. You have options like “Make this user administrator”, which will add it to the wheel group and give it sudo access, “Require a password to use this account”, and Advanced settings for additional groups, different home directory, etc.
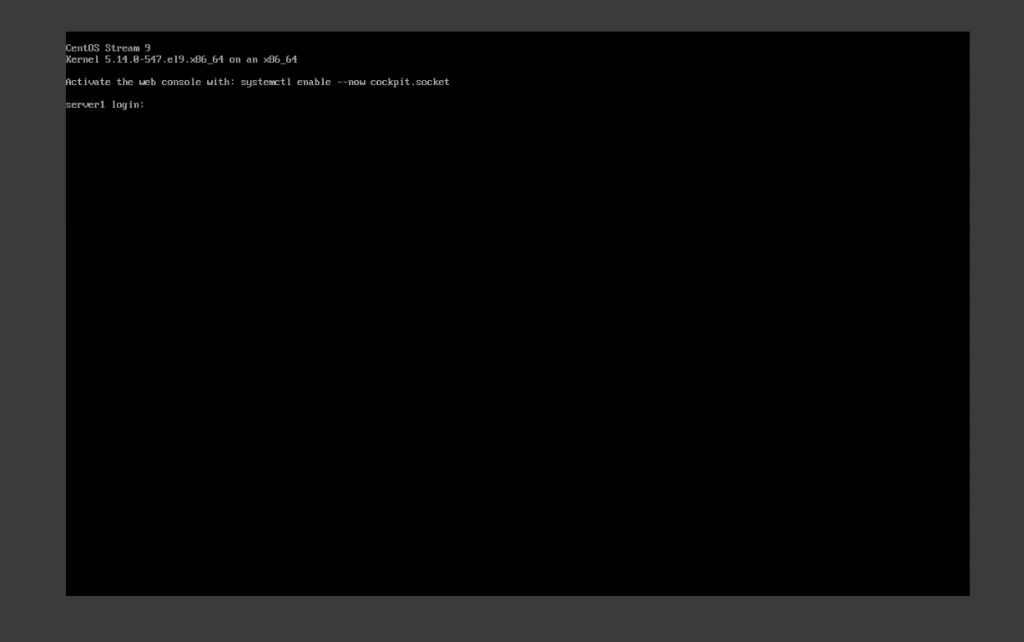
Once done, click Begin Installation. It will take roughly 5 minutes to install the OS, depending on which options you selected. Once installation is complete, click on Reboot System to boot into the newly installed OS.


Leave a Reply